Pedicure - step by step

Well-groomed feet are, like the hands, a showcase of us women. When the spring and summer comes after winter, it is time to unveil them with joy. If you take care of your feet systematically throughout the year, and the pedicure treatment that you perform at home or in the salon is carried out correctly, you have nothing to fear. We will tell you how to take care of your feet in a few simple steps and make the pedicure safe, durable and, above all, beautiful. Moreover, we will tell you about products that will speed up your work as much as possible and will convince you that it is really worth taking care of your feet
Pedicure – what kind of drills?
When starting a pedicure at home, it is worth starting work by removing calloused from the heel area, on the metatarsus, and from the toes. For this you will need a nail drill machine and properly selected nail drills. Sanding caps are perfect for pedicures. On the website of our store, there are sanding caps with a diameter of 10 or 13 mm. In addition, you can choose from a variety of grades from 60-120. Remember that the smaller the gradation, the stronger the product will be. Therefore, you need to choose the appropriate gradation for the condition of the skin. Grades 60 and 80 are used to develop calluses and 120 to smooth the skin of the feet. The caps can be used for both dry and wet treatments. The white color of the caps is helpful both in the saloon and at home. The snow-white color means that the cutter has not been used before and is fully sterile and safe. So take the nail drill machine and we start.
Preparation of the feet with a nail drill machine
Remember that we work with the nail drill machine from the bottom up - first the heel, then the metatarsus, the instep and the toes. Sanding caps are the best for pedicure treatments.
1. The turnover at which the nail drill machine should work when working on the heels is about 15,000. We work on larger ones when we are dealing with very calloused epidermis.
2. We use the nail drill machine for the heels using sanding caps in one direction, with short, quick movements. Working in this way will not cause a feeling of welding and burning.
3. We use the nail drill machine for the instep by stretching your toes upwards.
4. Milling the toes at 10-15 thousand revolutions because the skin in this place is much thinner than on the heels.
Milling cuticles of the feet
1. We develop periungual shafts with a cylinder-shaped mandrel, it is much more convenient to use than classic sanding caps.
2. Rout the skin around the nails with a sanding band 240 grit.
3. Remove the cuticles grown on the nails with a cone cutter or a cylindrical cutter. Milling the cuticles of the feet is repulsively sweeping movements.
4. A diamond ball cutter will help you remove epithelial residues around the nail.
5. With the help of pliers, remove the previously removed cuticles.
Filling the toenails
1. If the toenails are too long, use a plier or nail clippers to shorten their length before filing.
2. The file that works best for toenails is 180/240. You can also use a slim straight file, which will help you work on hard-to-reach places and small nails.
3. Using a file, gently process all toenails to the desired length.
4. Smooth the toenail surface with a polishing block
Which base and top for pedicure is the best?
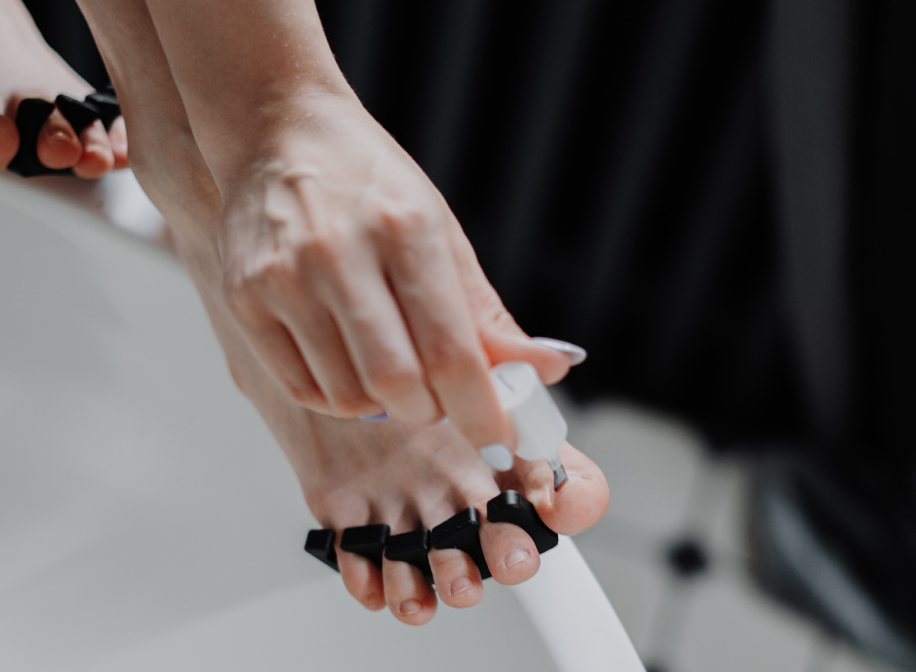
If you are wondering which pedicure base will be the best and will make your stylization exceptionally durable, then be sure to reach for the base and the 2in1 top. It is a product with a fairly thin consistency that allows you to build extremely thin layers of the product. As a result - such toenails will be very thin, and thus much more comfortable in everyday use, for example when you wear covered shoes. In addition, when used as a top, it has an extremely high level of shine and scratch resistance. A hybrid top that does not rub off and does not scratch is of key importance in the case of pedicures.
Hybrid at the feet - step by step
1. Degrease the dusted toenails with a brush by applying Nail Prep on them, and then after evaporating Primer Delicato. These products are not cured in a lamp. Their use significantly extends the life of the pedicure and protects the styling against chipping and air pockets.
2. After waiting about 30 seconds from applying the above-mentioned products, apply a very thin layer of Base & Top - 2 in 1. Cure in the lamp depending on its power.
3. We apply a thin layer of the selected color of UV gel polish, harden in the lamp and repeat the action. To place the color precisely next to the cuticles, you can use a thin brush for decorating.
4. As a topcoat, apply a thin layer of Base & Top - 2 in 1. Cure in a lamp.
5. After removing the toenails from the lamp, wipe the whole styling with a cotton swab soaked in the Extra Shine cleaneer. This product will additionally enhance the shine level of the entire styling.
6. Finish the pedicure process with the use of a scented oil, which will nurture the cuticles after the treatment, and also allow you to enjoy a beautiful fruity and floral fragrance.

Comments:
Add your comment :